
1 To protect the sealing surfaces and prevent contamination of the system by dirt or other pollutants, do not remove the protective caps and/or plugs until it is time to assemble the components, see below picture.
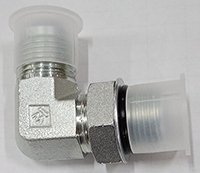
With protective cap
2 Prior to assembly, remove protective caps and/or plugs and inspect the connector and the port to ensure both mating parts are free of burrs, nicks, scratches or any foreign material.
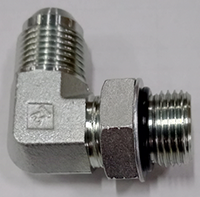
Remove protective cap
3 If O-ring is not present, install O-ring on the port end of the connector using a proper O-ring installation tool, taking care not to cut or nick the O-ring. Lubricate the O-ring with a light coat of system fluid or compatible oil before install O-ring.
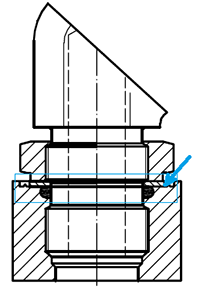
4 Prepare 1 — The O-ring should be located in the groove adjacent to the face of the back-up washer. The washer and O-ring should be positioned at the extreme top end of the groove as below shown.
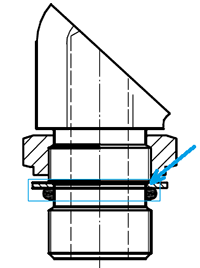
Locknut and washer backed off with O-ring in position
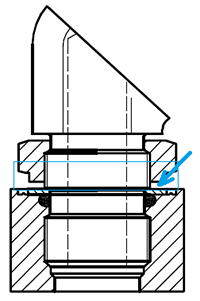
5 Prepare 2 — Position the locknut to just touch the back-up washer as shown. The locknut in this position eliminates potential damage to the back-up washer during the next step installation into the port.
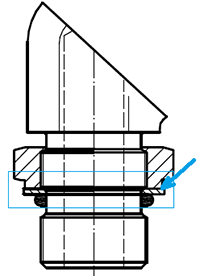
Position the locknut to just touch the back-up washer
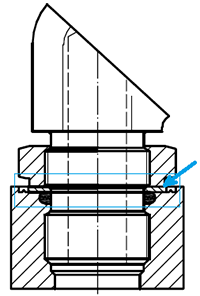
6 Install 1 — Install the connector into the port until the back-up washer contacts the face of the port as shown.
CAUTION — Overtightening beyond contact can cause damage to the back-up washer if the washer is not supported by the locknut.
7 Install 2 — Adjust the connector to the proper position by turning counter clockwise up to a maximum of one turn as shown to provide proper alignment with the mating connector, tube assembly or hose assembly.
Adjust the connector to the proper position
8 Install 3 — Using two wrenches, use the backup wrench to hold the connector in the desired position and then use the torque wrench to the tighten the locknut to the appropriate torque level given by the manufacturer.
Tightened to final position
9 Visually inspect, where possible, the joint to ensure the O-ring is not pinched or bulging out from under the washer and that the backup washer is properly seated flat against the face of the port, see below the correct final assembly.
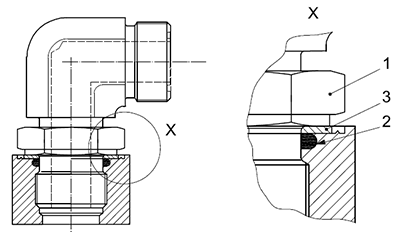
Key
1 Locknut
2 O-ring
3 Back up washer
Post time: Jan-20-2022